
Page 261 - TransAT_Tutorial_Manual
P. 261
TransAT Tutorial Manual 6.2. countercurrent
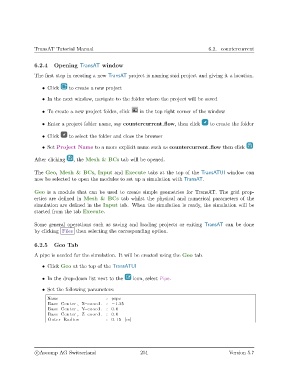
6.2.4 Opening TransAT window
The first step in creating a new TransAT project is naming said project and giving it a location.
• Click to create a new project
• In the next window, navigate to the folder where the project will be saved
• To create a new project folder, click in the top right corner of the window
• Enter a project folder name, say countercurrent flow, then click to create the folder
• Click to select the folder and close the browser
• Set Project Name to a more explicit name such as countercurrent flow then click
After clicking , the Mesh & BCs tab will be opened.
The Geo, Mesh & BCs, Input and Execute tabs at the top of the TransATUI window can
now be selected to open the modules to set up a simulation with TransAT.
Geo is a module that can be used to create simple geometries for TransAT. The grid prop-
erties are defined in Mesh & BCs tab whilst the physical and numerical parameters of the
simulation are defined in the Input tab. When the simulation is ready, the simulation will be
started from the tab Execute.
Some general operations such as saving and loading projects or exiting TransAT can be done
by clicking Files then selecting the corresponding option.
6.2.5 Geo Tab
A pipe is needed for the simulation. It will be created using the Geo tab.
• Click Geo at the top of the TransATUI
• In the drop-down list next to the icon, select Pipe.
• Set the following parameters:
Name : pipe
Base Center , X−coord . : −1.25
Base Center , Y−coord . : 0.0
Base Center , Z−coord . : 0.0
Outer Radius : 0.15 [m]
c
Ascomp AG Switzerland 251 Version 5.7